Plan Ahead
Note: Click any image to expand.
The Plan Ahead feature allows you to create potential schedule plans for future terms. When you are ready to register, you will be able to load these plans. Once a term is open to browse for classes you can start planning ahead.
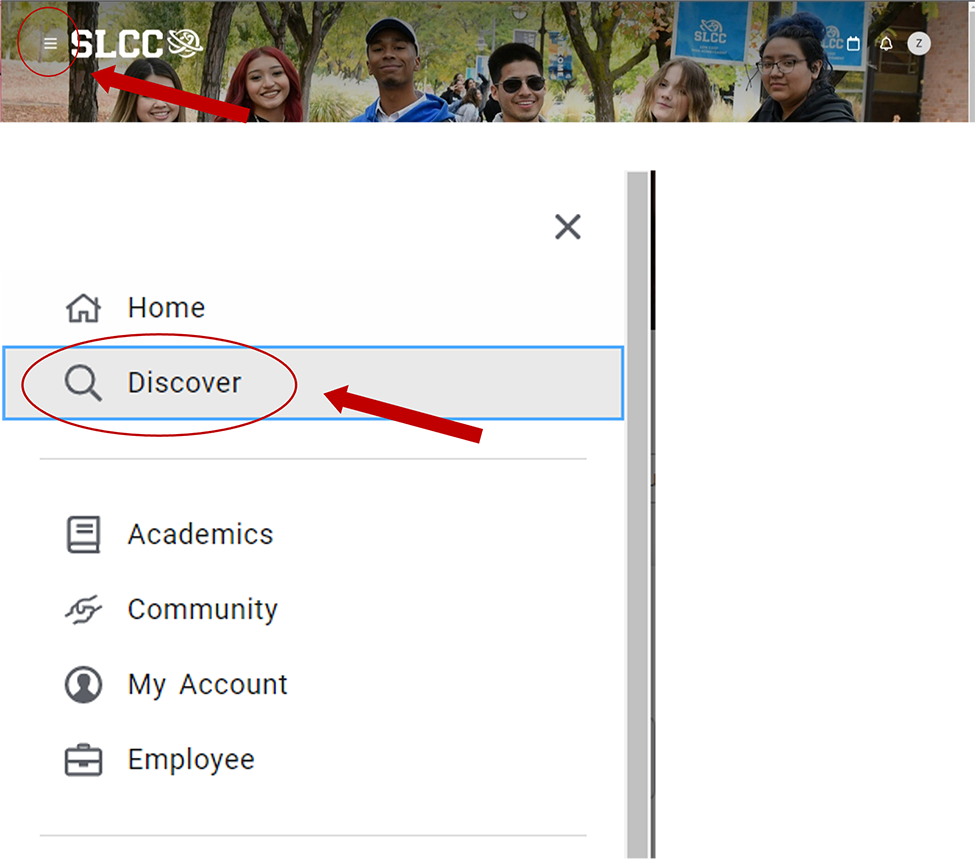
1. Log into your MySLCC page and click the hamburger button in the right-hand corner. Click the Discover search button.
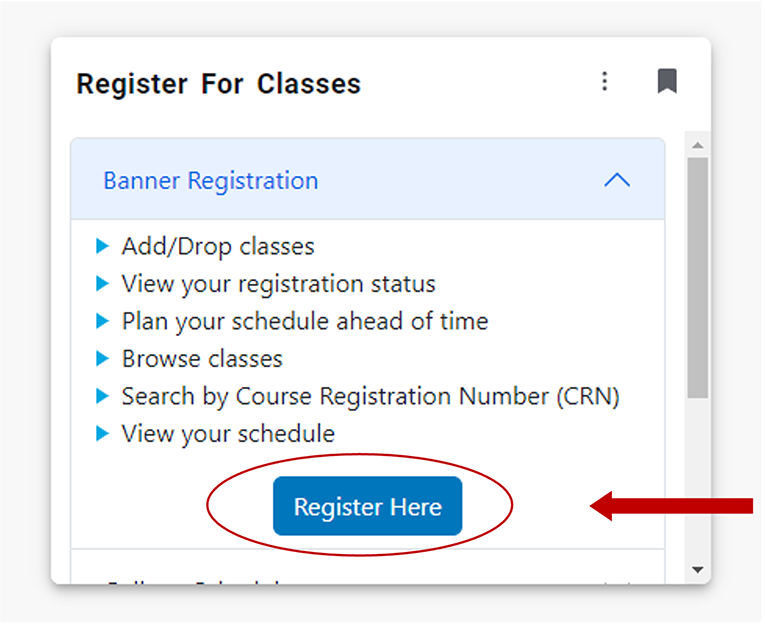
2. Search for the Register For Classes card (You can bookmark it by clicking the little icon in the right-hand corner)

3. Click Register Here
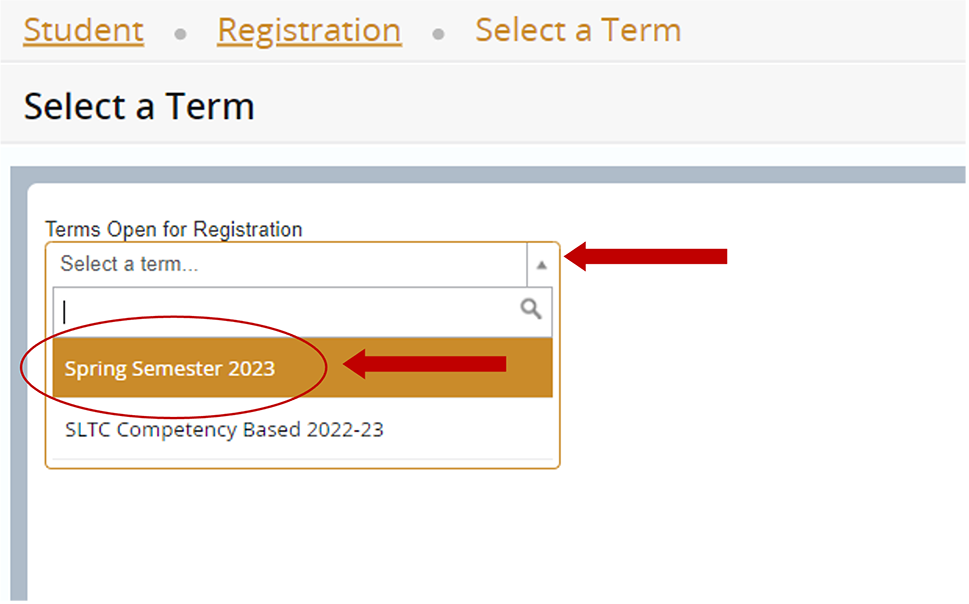
4. From the dropdown menu, select a semester and click Continue
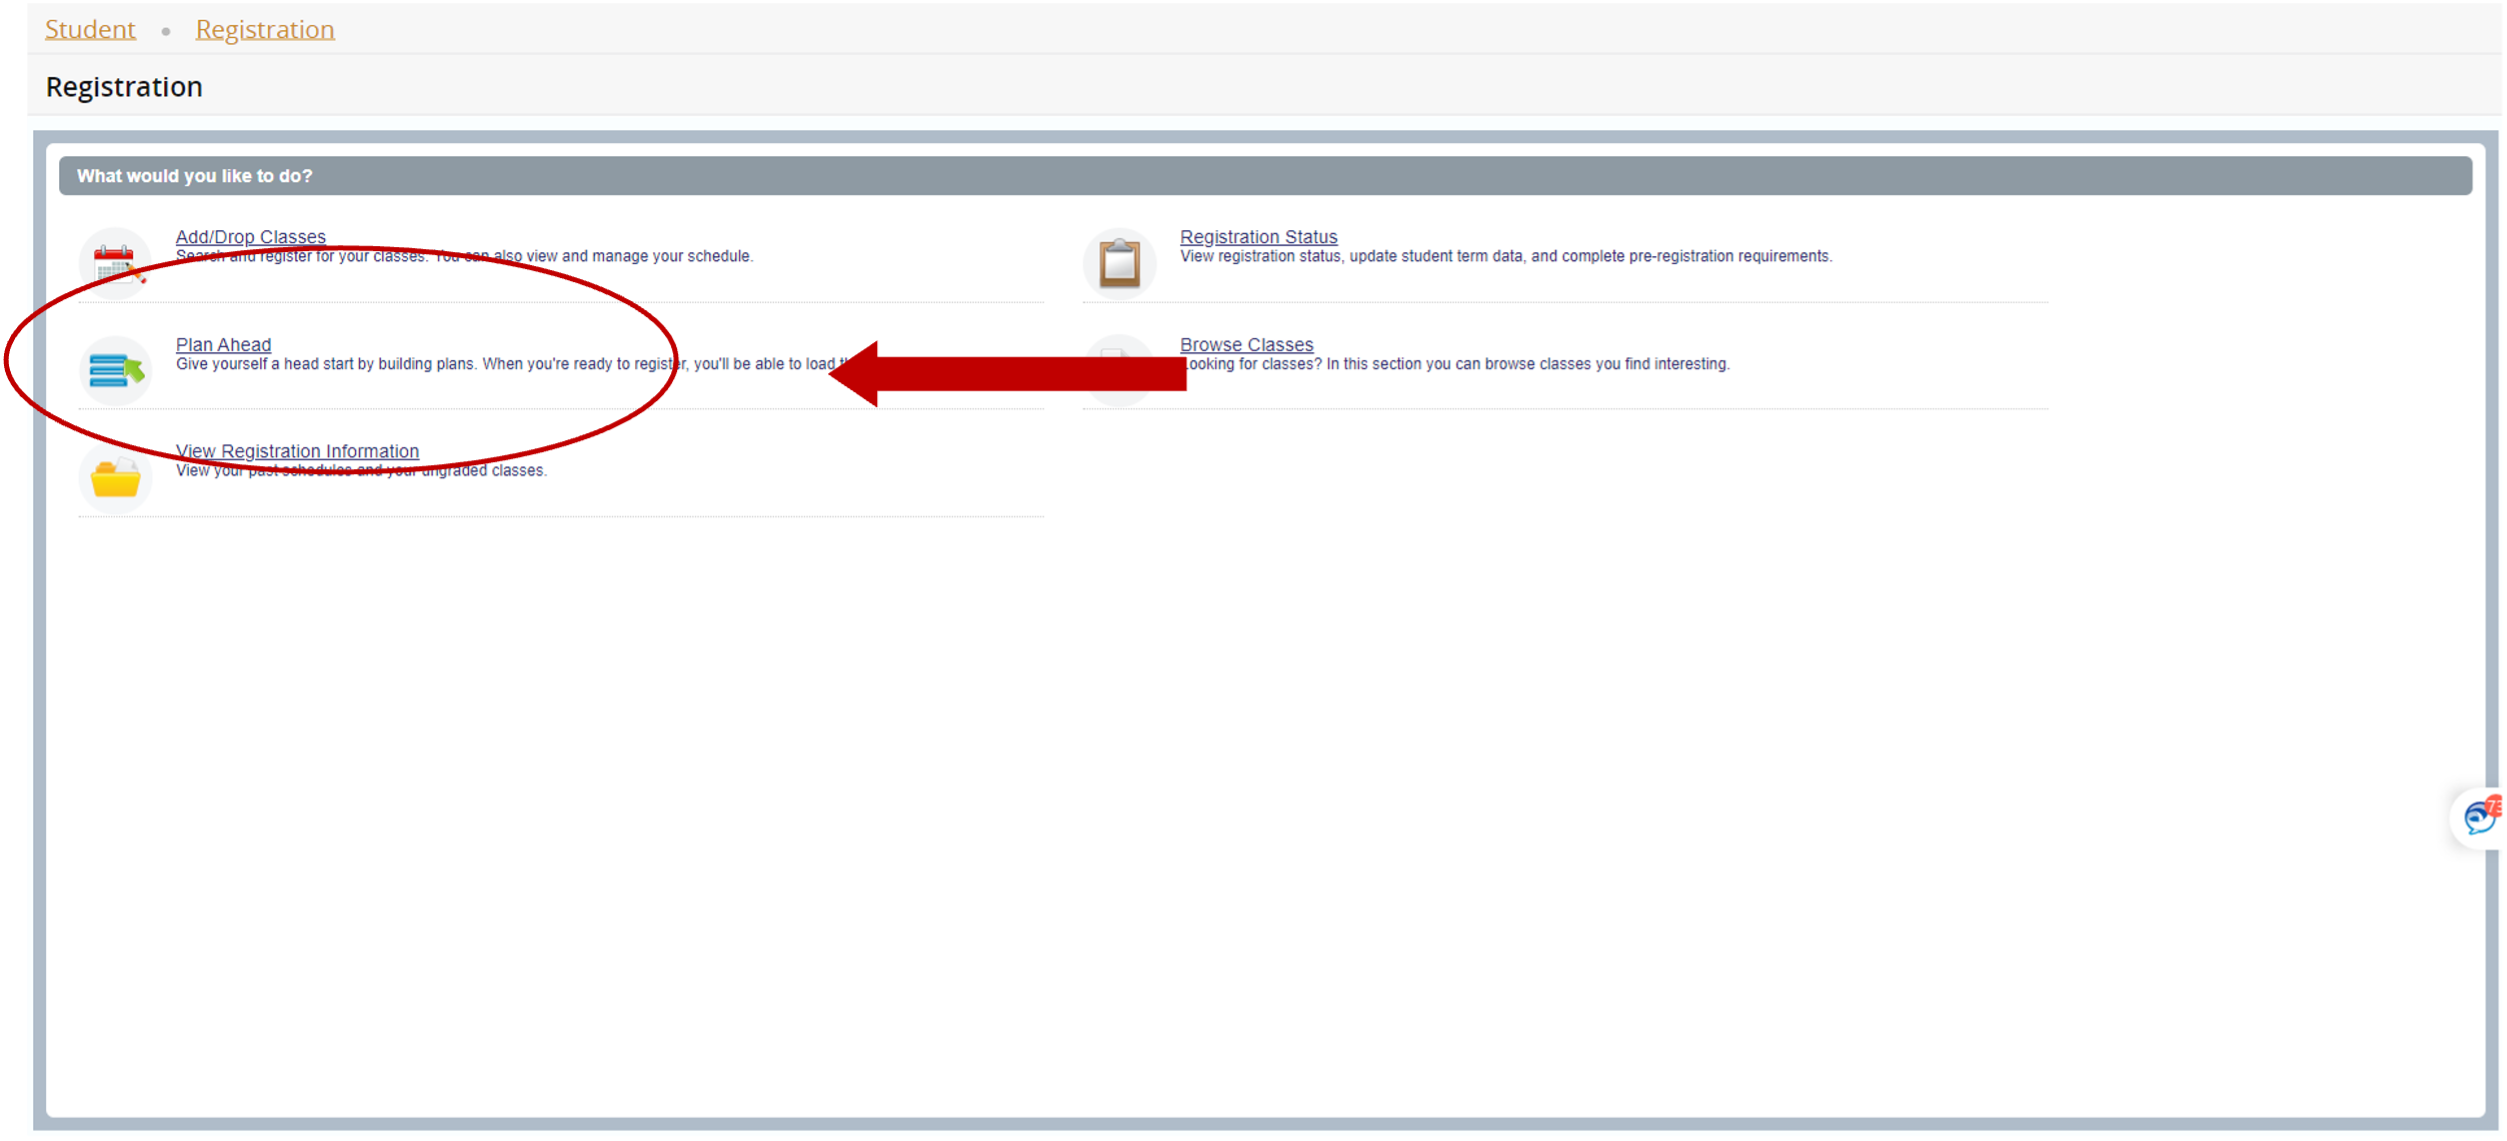
5. Click on Plan Ahead
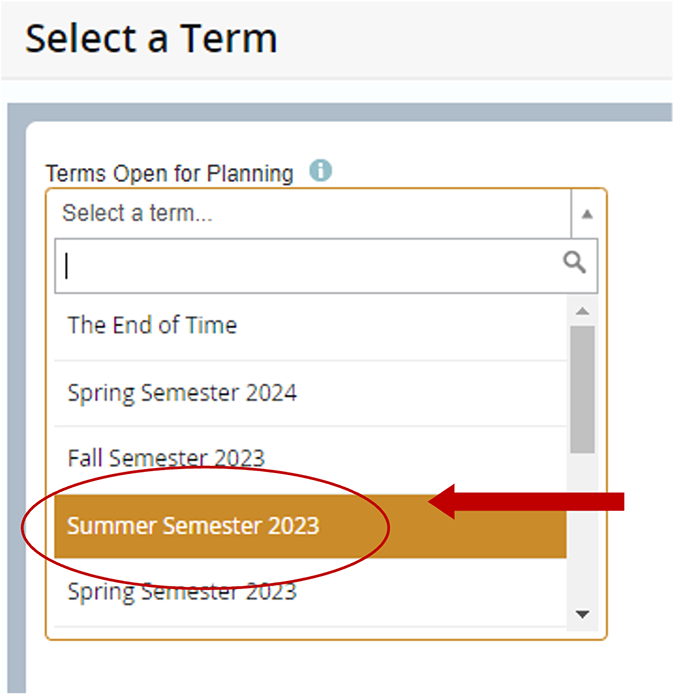
6. From the dropdown menu, select the semester you wish to take courses and click Continue
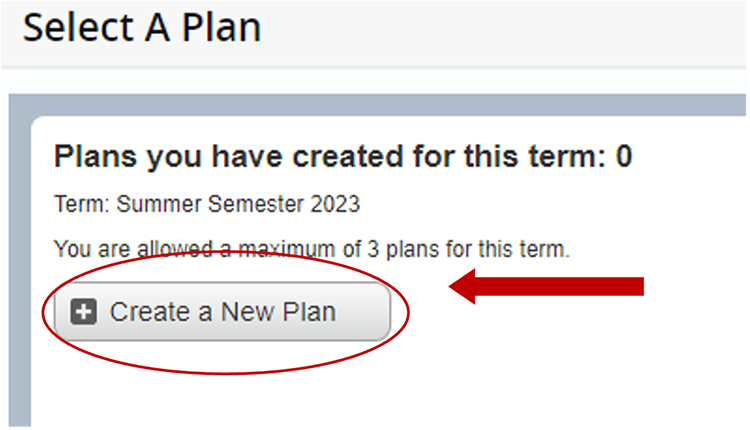
7. The Select A Plan page appears. Click + Create a New Plan
8. Enter your search criteria and click Search

9. Click on View Sections to select the specific class you wish to add to your schedule

10. Click Add when you find the class you wish to add to your schedule. Click Catalog Search Results to go back to the previous page

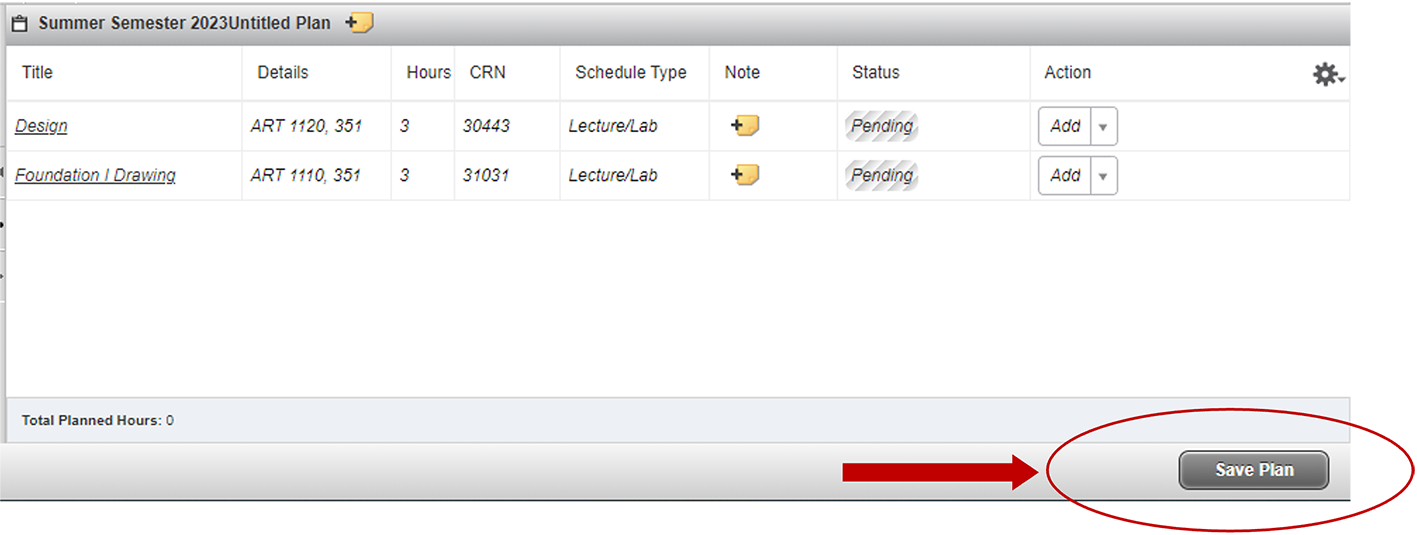
11. When you are finished creating your plan, click Save Plan
12. A Name Your Plan popup window appears. Enter a name and click Save
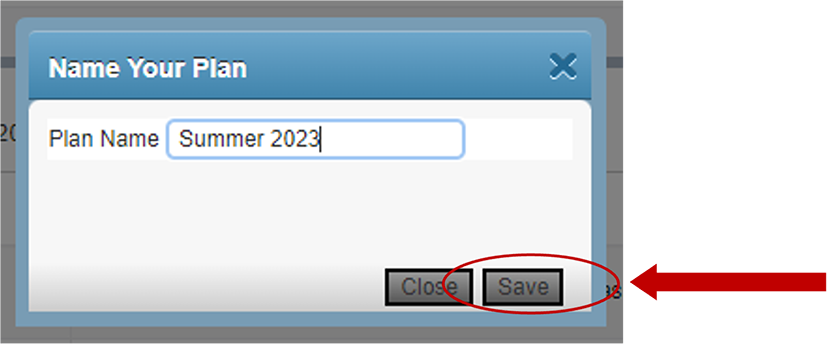
13. Under Status, it should read Planned highlighted in green
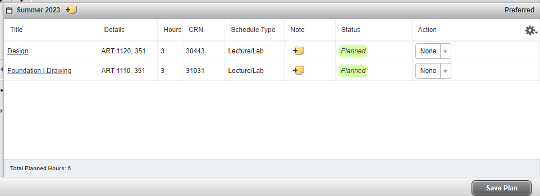
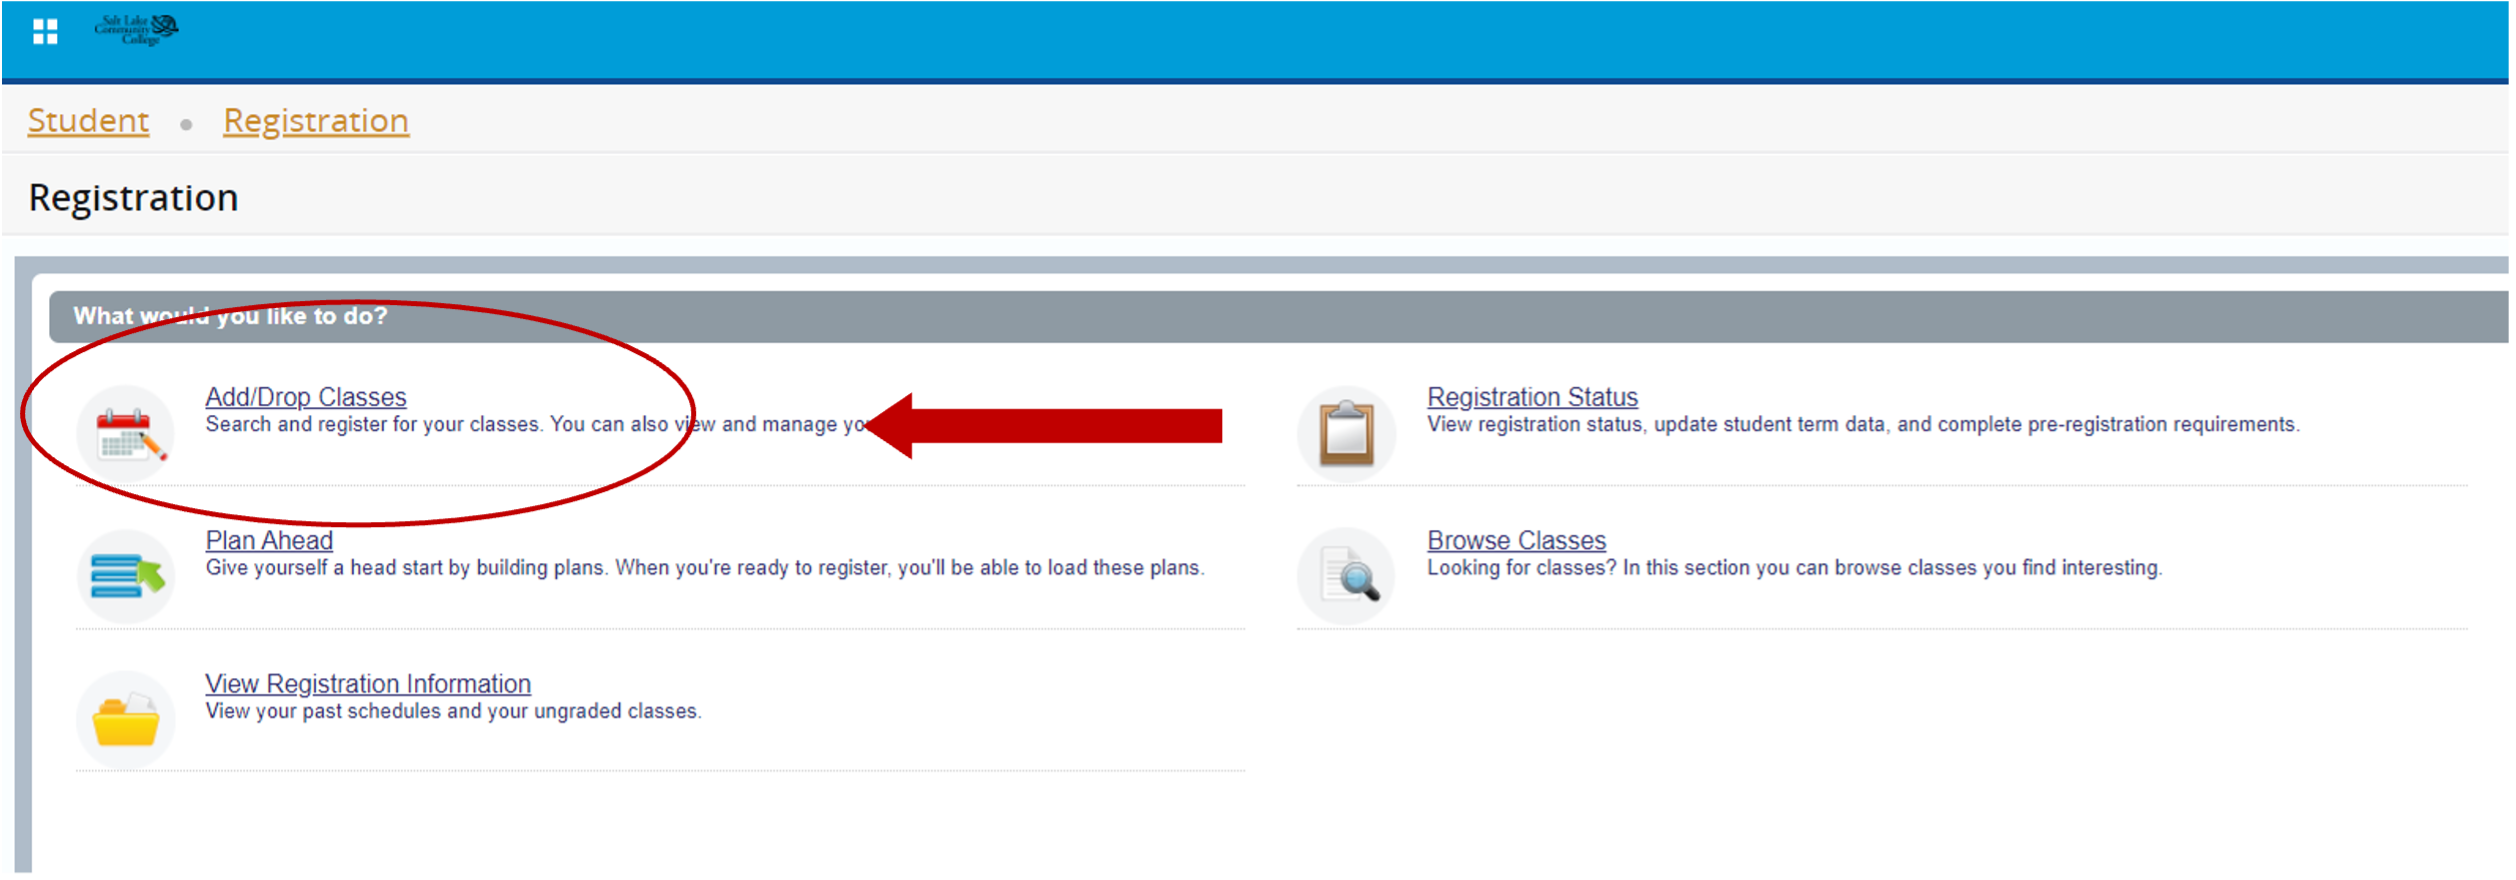
14. When registration opens and you are ready to add classes to your schedule, select Add/Drop Classes
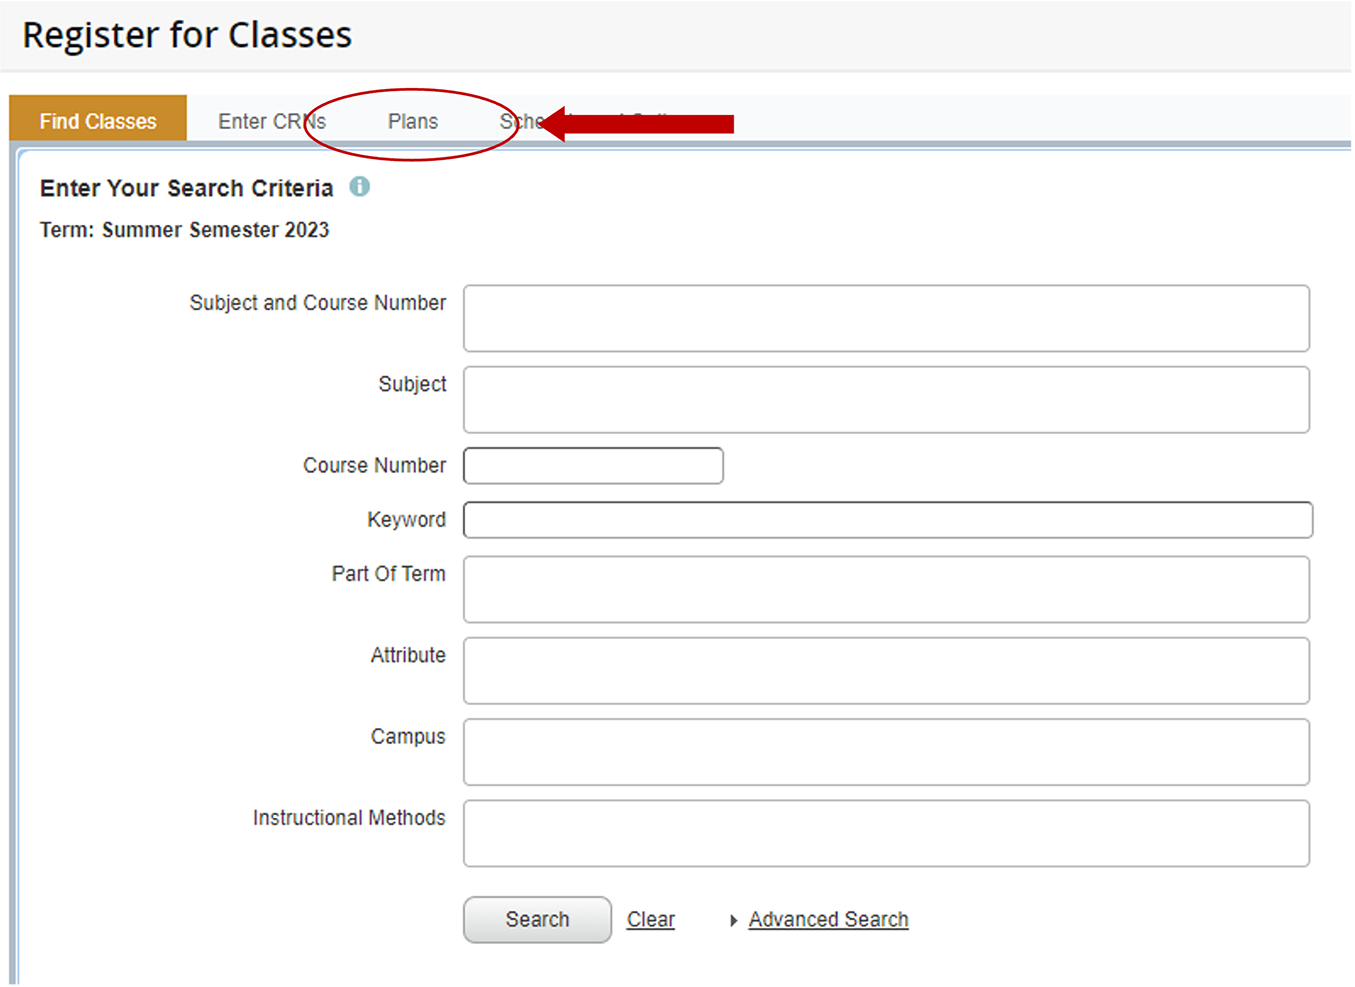
15. The Register for Classes page appears. Click on the Plans tab
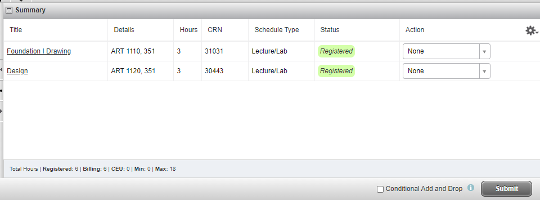
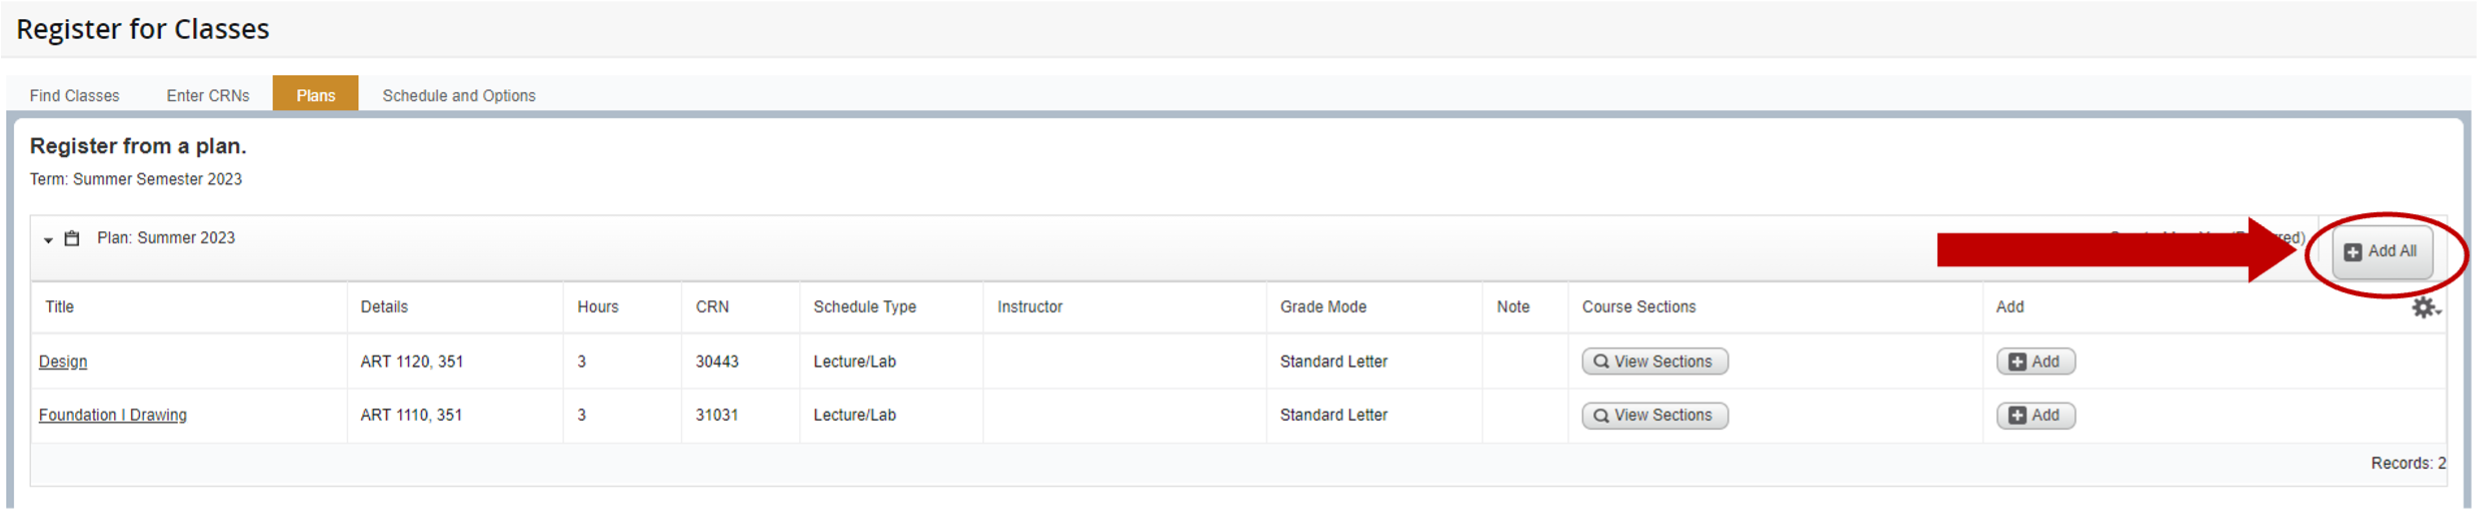
16. Your saved plan will appear. If you wish to move forward with this schedule, click Add All on the right
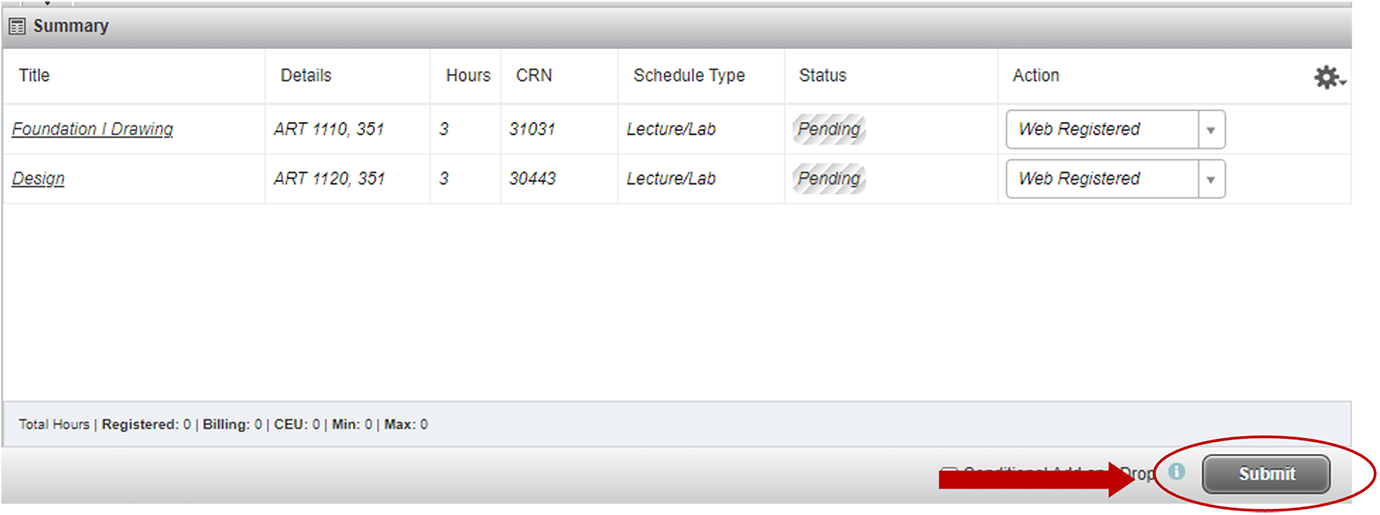
17. The classes will move down into the Summary box in the right-hand corner of the page. Under Status, it should say Pending highlighted in grey. Click Submit to add the classes to your schedule
18. Under Status, it should say Registered highlighted in green. You have successfully registered